Showing posts with label eyeshadow. Show all posts

Monday, February 3, 2014

My Top 10 Under $10! (+ a bonus photoshoot)

So if you're ballin' on a budget (like I am most of the time) but you're still on the lookout for great makeup products, you're in the right place. Here's a list of some of my all-time favorite makeup products which all cost $10 or less! :)

(These are not in any particular order)

1. Covergirl Outlast Stay Fabulous 3 in 1 Foundation ($9.47): Mine looks really gross. Sorry but I use it a ton. I have mentioned this foundation before but I have to bring it up again because the price point just makes it even more amazing. It's got great coverage, lasts a long time, and doesn't break me out!
2. Rimmel Stay Matte Powder ($3.97): Sooooo I've literally used this so much all of the writing came off of the packaging. (That might happen a lot in this post) This powder is freaking amazing. I have ridiculously oily skin and this keeps my skin nice and matte. But also, not so matte that my skin looks unnatural. The only other powder that I like as much as this one is from NARS and it's literally 10x the price.
3. NYX Photo-Loving Primer ($9.99- side note; this usually retails for $11.99 according the the NYX website but I've bought it at Target for $9.99 so that still counts...right?): This is great because it's got that smooth silicone-like feel but it doesn't leave my skin feeling greasy. It helps my foundation go on very smoothly and also helps it to last a lot longer.
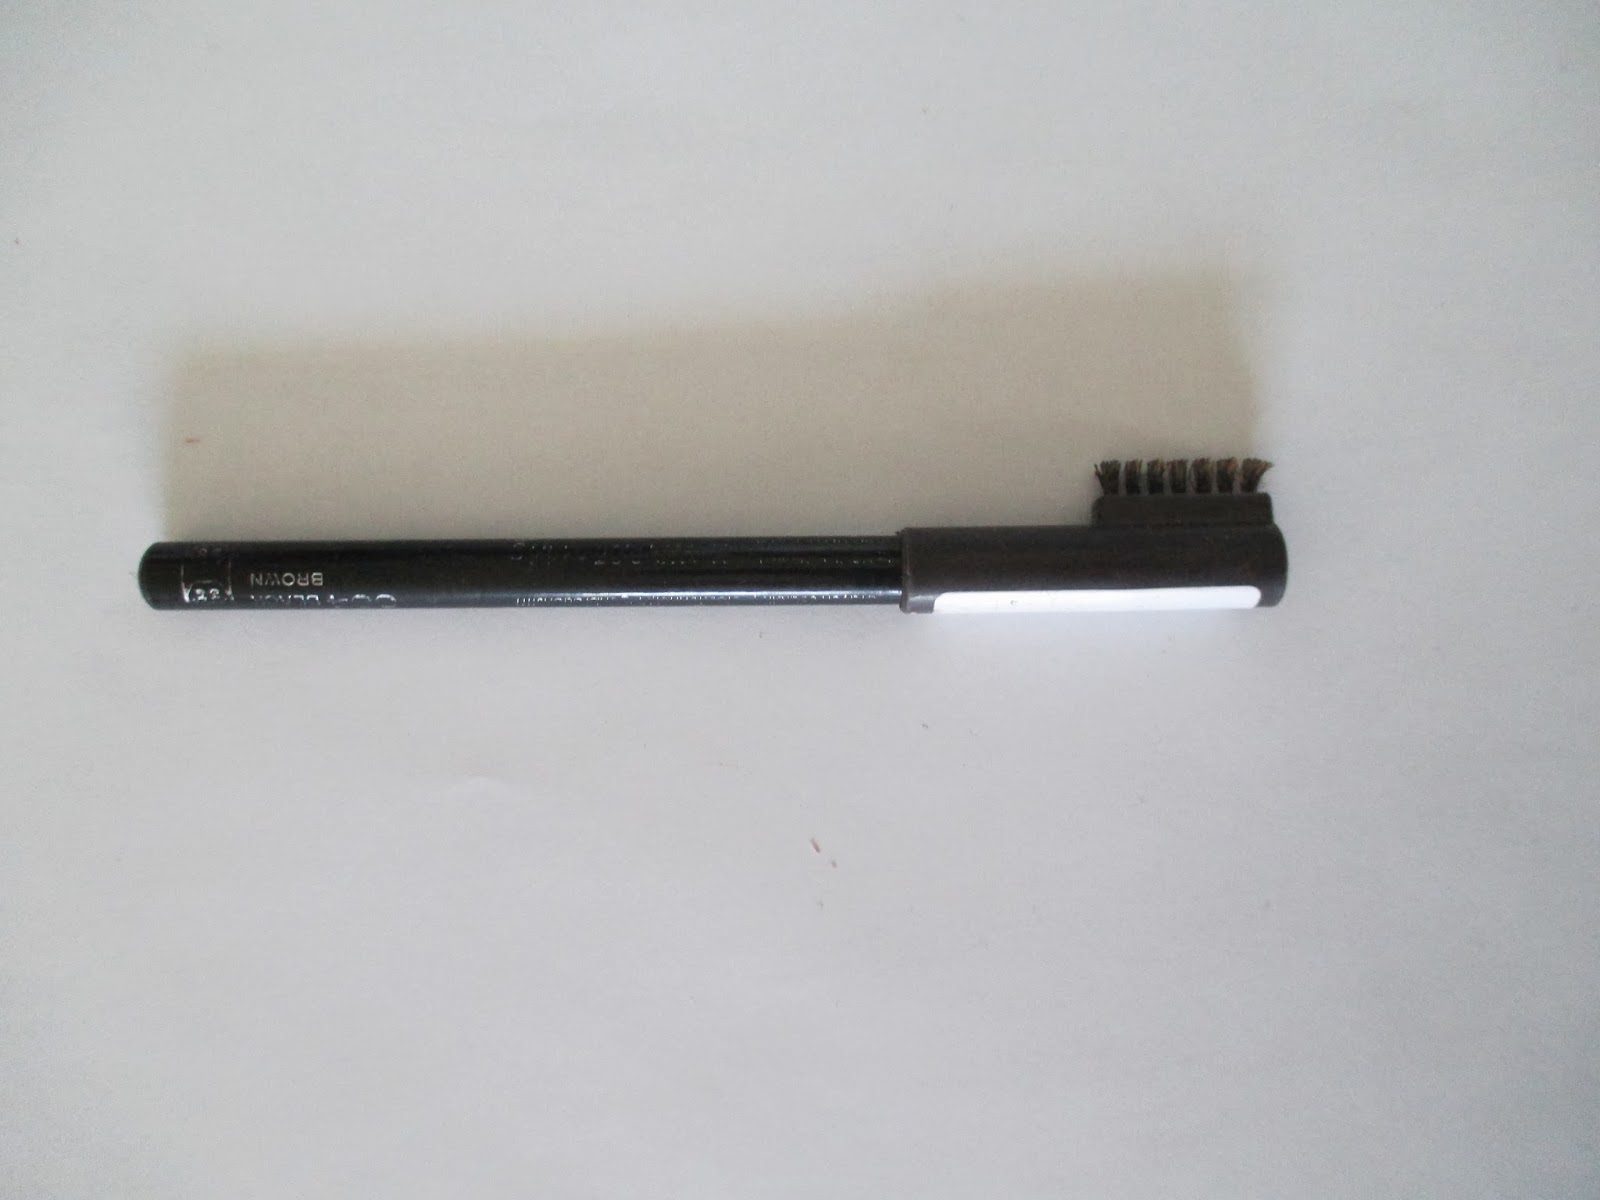
4. Rimmel Brow Pencil ($3.49): This is probably my 8th one of these. I've never repurchased anything 8 times so that's already saying quite a bit. Lol. But I really like this pencil because it lasts all day and I never really have to touch up my brows throughout the day. 
5. Maybelline Great Lash Clear Mascara ($4.49): I use this to set my brows and it works amazingly well. Or I guess, to be honest, I haven't tried very many brow gels but I never have to touch up my eyebrows so this must be doing something right.

6. ELF Studio Blush in Berry Merry ($3): Pretty much all of the ELF Studio blushes are really great but this one just happens to be my favorite. They have amazing pigmentation and last for a long time. And you'll never run out of product because you hardly need any to get a beautiful look.
7. Maybelline Dream Lumi Touch Concealer ($6.49): This concealer is perfect for highlighting under the eyes. It has medium coverage (I wouldn't use this for spot covering) and highlights amazingly. It helps make me look much more awake!
8. Clinique Bottom Lash Mascara ($10): This is pretty much the only mascara that doesn't smudge on my lower lashes. If you know me in real life, you know that I cry very easily while watching TV/movies (I'm talking like even during commercials, it's really embarrassing) and this lasts even through that. And the teeny-tiny brush grabs every little eyelash and really makes them stand out.

9. Maybelline Color Tattoo in Bad to the Bronze ($6.99): This has been one of my holy grail products for about 3 years now. I love it because when I'm in a hurry I just slap this all over my lid and it looks like I put tons of effort into my eyeshadow when it took negative 2 seconds. This can also be used as an eyeshadow base with other shadows as well. There are a ton of beautiful colors in this collection to choose from so there's something for everyone.
10. Smith's Strawberry Lip Balm ($7): Last but not least. This lip balm is sooooo hydrating. It makes my lips feel smooth and silky. I like wearing this overnight because I wake up with plump and moisturized lips. You can also wear this during the day and it just helps even out your lips and makes them look perfect. It also smells like strawberries which I love!

*Please note that prices on these products could vary based on where you're buying them from.

I really hope this helps you out! If you have any questions, please feel free to ask! :)

Oh and here's a little bonus!  I did a photoshoot last week with my friend Kara Chin who runs a fashion blog called Stylish in Seattle <-----Click the link and check her out! :)

Here's some behind the scenes photos of me doing her makeup and a sneak peak of the shoot!


I went for a very casual makeup look with just a little hint of edginess with a neutral smokey eye :)

Products Used:
-Estee Lauder powder foundation
-Urban Decay brow kit
-NARS eyeshadow primer
-Urban Decay eyeshadow in Suspect (from the Naked 2 palette)
-MAC eyeshadows in Brulee and Concrete
-MAC gel eyeliner in Blacktrack
-MAC blush in Harmony
-NARS blush in Madly
-Loreal lipstick in Fairest Nude

All photos were taken by my pal Taylor Matsunaga. She also shot the photos that will be on Kara's blog so I will link that as soon as it's up. You can see more of Taylor's photos ----> here :)
But she mostly does film (she just happens to also be a good photographer) so check out her YouTube channel -----> here :)

Hope you enjoyed this suuuuper long post! Haha.
Have a great week! :)
-Ashley


Tuesday, January 28, 2014

My Favorite Makeup Brushes!

So I've tried a lot of makeup brushes over the years and these are the best yet! I change up my makeup all the time but I never feel the need to change up my brushes. The MAC ones are the only ones on the pricier side but everything else is very affordable :)

FACE BRUSHES

I use pretty much just Real Techniques, MAC, and ELF brushes on my face.


FOUNDATION (top to bottom):
1. ELF Powder Brush ($3): A flat top brush that I use for liquid foundation. I usually use this to get a more natural coverage out of my foundation.
2. Real Techniques Expert Face Brush ($9): I also use this for liquid foundation but this gives me more of a flawless finish vs. a natural look.
3. Real Techniques Buffing Brush (I believe this is only sold in the Core Collection which retails for $18 but includes 3 other brushes): I have always thought that powder foundation never worked for me but now I've realized that I've been using the wrong brushes. This one is perfect! I use it with the Hello Flawless powder by Benefit.


POWDER/CHEEKS (top to bottom):
1. Real Techniques Blush Brush ($9): I use this for setting my foundation with powder. I like it because it's tapered so it can get into all of the crevices of my face. (sounds weird, but it works)
2. MAC 109 Small Contour Brush ($35): This is perfect for contouring the cheeks. This one is a little on the pricier side so a more affordable option would be the Real Techniques Contour Brush which is sold in the same kit along with the Buffing Brush.
3. MAC 129 Powder/Blush Brush ($35): This size and shape is perfect for adding a touch of blush to the apples of your cheeks.  You could alternatively use the Sonia Kashuk Small Powder/Blusher Brush ($8.99)


ELF Stipple Brush ($3): Side note-this brush isn't that special that it go it's own picture I just ran out of space. Lol. But anyway, I use this to sweep away any eyeshadow fallout.


Real Techniques Domed Shadow Brush (only sold in the Starter Set which retails for $18): I forgot to put this in the big photo. Lol. But this is amazing for concealer! This is the only brush I use for concealer because it blends it out perfectly.

EYE BRUSHES:

I have a slightly more eclectic collection of eye brushes with various brands.


FLAT SHADER/BASE SHADOW:
1. This one is from My Glam/IPSY. I got it in a monthly subscription so I'm not sure where else to get it. But this is perfect for putting highlight under my brow bone. It's different from other flat-shader brushes because it's much smaller.
2. Up & Up (Target brand) flat shader brush (somewhere between $3 and $5 not sure because I bought this like 5 years ago): I use this to deepen my crease colors. You can also use this for highlighting under the brow.
3. Real Techniques Base-Shadow Brush (also sold in the Starter Set): I love laying down shadow all over my lid with this.


BLENDING BRUSHES:
1. MAC 217 Blending Brush ($24): I know I put two of them in there but it's because they're perfect. I'm obsessed with them. For all of the other high-end brushes I have an alternative but these cannot be replaced in my eyes. Sounds pretty dramatic but I use these every single time I use eyeshadow. You can lay down eyeshadow, deepen the crease, or blend out a smokey eye. If I could only have one eyeshadow brush, it would be this one.
2. My Glam/Ipsy Blending Brush: Sorry for putting another one of these brushes in here but I really use it all the time. It's hugeeee and fluffy so it softens up a smokey eye very easily. If you can't find this one, try the Sonia Kashuk Blending Brush ($3.99)


BROWS/LINER:
1. MAC 266 Small Angle Brush ($20): I use this for filling in my eyebrows which give them a very natural look. You can also use it for gel/powder eyeliner.
2. Sigma E30 Pencil Brush ($12): Perfect for highlighting the inner corner of your eyes or smudging out eyeliner.
3. ULTA Pro Eye Smudger Brush ($10):  I use this to add eyeshadow to my lower lash line and to smudge out eyeliner as well.

I hope this was at least a little bit helpful to you if you're in the market for some new brushes. Good tools can make even bad makeup look decent :) 

Thanks for reading! :)
-Ashley


Tuesday, December 17, 2013

Top 15 MAC eyeshadows! :)

So I've been gone for a bit...but I'm back! Lol. Finally done with finals and all that jazz and now I'm free, free, free at last! :)

Here I have my MAC pro palette of 15 eyeshadows that I chose individually. Please keep in mind that I filled this palette over the course of many months as it would be farrrr too expensive to buy all of these at once. Lol.


I have the new pro palette which retails for $8 and then the eyeshadow insert was an additional $2 and then every little eyeshadow pan was $10 so let's just not do the math for how much money I've used on this palette. Lol. But I honestly handpicked every single shade knowing that I would definitely use it. As you can tell, I don't really venture very far from neutral colors but there's enough range here so I can go from a really natural look to an intense/dark smokey eye ;)


Top row (L-R):
1. Brulee. The perfect matte highlight. I'm not a fan of just white because I find it to be a little too harsh for everyday wear so this beige/cream color is perfect.
2. Phloof!
3. Nylon this and Phloof! are the ultimate inner-corner highlight shades.
4. Naked Lunch
5. All That Glitters


Middle row (L-R):
1. Patina. Probably my most-used shade in the entire palette. It's perfect for all over the lid. I literally wear this almost everyday.
2. Wood Winked. Another shade I use all the time. I have yet to find a dupe of this.
3. Shale
4. Satin Taupe. My favorite for when I'm doing a very blended out smokey eye. 
5. Sketch. The first eyeshadow to ever teach me the power of purple eye makeup paired with brown eyes (it's great).


Bottom row (L-R):
1. Cork. My go-to shade for blending out a smokey look.
2. Concrete. My current favorite for deepening the outer corner of my eyes.
3. Folie
4. Embark. The perrrrrfect chocolate brown.
5. Carbon. The classic matte black that everyone needs in their collection. I actually love the fact that it's not a super pigmented shade, but that's just me because I'm all about subtlety.

Hope this helped you if you're in the market for some MAC eyeshadows. I truly believe that they have some of the best quality ones available that aren't super expensive (well they're kind of expensive if you're buying a lot but you know what I mean) They also offer 2 & 4 pan palettes and individual eyeshadows as well! 

Thanks for putting up with me :)
-Ashley


Friday, November 29, 2013

Giving Thanks: Complete fall look!

Happy belated Thanksgiving everyone! Hope you all had amazing holiday with your loved ones. Here's the makeup and outfit I wore yesterday to my family gathering. I hope this can give you some inspiration for the rest of fall! :)

*beware of the picture of me with no makeup

Step 1: Makeup

Before (shield your eyes everyone):

After:

I went for very natural looking skin, a neutral smokey eye, and a slightly bolder lip. Perfect for a casual night with friends or family :)

Products used:
-Urban Decay Naked Skin Foundation
-Maybelline Dream-Lumi Touch concealer
-NARS translucent pressed powder
-MAC blush in Harmony (as a contour)
-ELF blush in Berry Merry
-Revlon lip butter in Sugar Plum


Eye focus:
-Rimmel brow pencil in Black Brown
-Urban decay eyeshadows: Sidecar (across the lid), Smog + Darkhorse (in the outer corner)
-MAC eyeshadows: Brulee (on the brow bone), Woodwinked (lower lash line), and Carbon (outer 1/3 of the lower lash line)
-Maybelline gel eyeliner in Blackest Black
-Clinique bottom lash mascara
-Urban Decay Cannonball mascara

Step 2: Outfit
*my deepest apologies because I'm awful at mirror selfies


Clothes/accessories:
-Sweater: Forever 21
-Black cami: Tilly's
-Skater skirt: Target
-Shoes: Urban Outfitters
-Watch: Nordstrom
-Infinity scarf: American Apparel
Also, please keep in mind that I live in Southern California so this outfit is definitely fall appropriate around here. Haha. If you live in a colder climate I would suggest adding some tights, warmer boots, and maybe layer denim jacket over the sweater :)

Step 3: Nails


Sephora by OPI: Chestnuts About You
I am obsessed with this nail polish! I love it at all times of the year but especially in the fall/winter time. It's a really nice metallic rose gold that I feel compliments all different skin tones. 

Step 4: Enjoy the fun!


I am thankful for so much this year. A lot has changed in my life and a lot of big decisions were made so I would just like to thank anyone and everyone who has supported me in my endeavors. I have the most amazing family and friends. 

Thanks for putting up with me <3
-Ashley

Thursday, November 21, 2013

Wanderlust? Makeup travel essentials.

Sooooo I just went to Vegas last weekend and as I was unpacking my stuff, I decided that I wanted to show you guys my travel makeup essentials! These are all items I use to keep my baggage at a minimum while traveling :)


This cosmetic bag is pretty much my lifesaver! It holds everything I need while still looking sleek! My sister got this for me from Tory Burch.


It might be hard to believe, but all of these items fit into this bag perfectly!


My staple products (in the order in which I apply makeup):

-NYX Pore Filler face primer
-Urban Decay Naked foundation. I usually pack a fairly lightweight foundation so I can wear it day or night. Just be sure to pack a great concealer! :)
-Sheer-cover concealer duo (do not let the name fool you. You get great coverage out of this!
-NARS Light-Reflecting Pressed Powder. A translucent powder is a must especially if you plan to go out for a long time and have oily skin like me. Glowy is cute, greasy is not.
-Benefit brow kit
-MAC eyeshadow palette (not pictured here but this is the point in which I put on eyeshadow. Also, side-note, I normally wouldn't travel with this much eyeshadow for only 3 days but I planned to do a lot of my friend's makeup and also it's Vegas so I thought, go hard or go home.
-Urban Decay 24/7 glide-on eye pencil in Zero. I honestly think you can get a great effect with a great pencil and some black eyeshadow so I don't even bother bringing liquid and/or gel liners.
-Urban Decay Cannonball mascara (it's definitely not as hard to remove as everyone says it is. I use the Almay makeup removing pads and they work perfectly fine and I never thought they were anything special or heavy-duty)
-Clinique bottom-lash mascara. This stuff is amazing! It has the tiniest brush to get all of your lower lashes and I don't know what they put into this formula but it doesn't smudge through oil, sweat, or tears and it's easy to remove as well.
-NARS Danmari blush palette. This palette is amazing as it is pretty much all inclusive. It has 4 blushes and a bronzer that I use for contouring and a highlight. Though this was limited edition last Christmas, they came out with another one this year with gorgeous shades as well and the same layout. This is so much more convenient than bringing 3 separate products.
-Smith's Strawberry lip balm. Because girl, crusty lips are not your friend! Especially as it gets colder we have to pay even more attention to our lips and skin in general.


I personally always take 3 lip colors: 1 nude, 1 red, and 1 berry. That way I can drastically change up my took depending on what I'm feeling.
(From L-R: Loreal; Fairest Nude, Revlon JBKBS; Crush, and Revlon; Mauvy Night all of which were featured on my Top 10 fall lip colors!)

Hope you guys enjoyed seeing some of my makeup travel essentials! I plan to do another post on all of the tools and brushes I take with me as well! If you have any further questions feel free to ask :)

Thanks for putting up with me <3
-Ashley


Monday, November 11, 2013

Photoshoot Phrenzy!

Here are some pictures from the photo shoot where I did the makeup for the Jazzmin online store :) (Click the name of the store to see more and you can also purchase all of the outfits shown on the website as well)


*all photos are screenshots taken from the site

I can't believe this is real life :)
Please also check out the online store as well because I honestly really love the clothes. 


Thanks for putting up with me <3
-Ashley